Doing low cost telepresence (for under $200)
Posted on October 08, 2015 in DIY • 7 min read
With a friend, we recently started a project of building a project of low cost telepresence robot (sorry, link in French only).
The goal is to build a robot that could be used to move around a room remotely, and stream audio and video in both directions. Our target budget is $200. We got a first working version (although it does not yet stream audio), and it is time for some explanations on the setup and how to build your own =) All the instructions, code and necessary stuff can be found at our git repo.
Basic idea
When taking part in a group meeting remotely, using some videoconference solution, it is often frustrating not being able to move around the room on the other side. This prevents us from having parallel discussions, and if the remote microphone is poor quality, we often do not hear clearly everybody speaking. Plus, someone speaking may be hidden by another speaker and many other such problems happen.
The goal was then to find a solution to do videoconferences (streaming both audio and video in both directions) and be able to move on the other side, to be able to see everyone and to come closer to the current speaker. Commercial solutions exist but they are really expensive (a few thousands dollars). We wanted to have the same basic features for $200, and it seems we almost achieved it!
Bill of Materials
The whole system is built around a Raspberry Pi and a PiCamera, which offer decent performances at a very fair price. The rest is really basic DIY stuff.
Here is the complete bill of materials:
- A Raspberry Pi 2 - $30
- A PiCamera - $30
- 2 external USB battery packs - 2 * $15.99 ≈ $30
- 2 continuous rotation servo for the wheels - 2 * $11.95 = $25
- 2 servo wheels - 2 * $4 = $8
- 1 standard servo for the camera control - $12
- 1 wifi USB adapter - $5
- 2 ball transfer unit
- Some plexiglas and ABS for laser cutting and 3D printing
Total: $140
Notes: * We had to use a Raspberry Pi model 2 for the nice performance boost on this model. Even more important is the increased number of GPIOs on this model, with 2 usable hardware PWMs (provided that you don’t use the integrated sound card output). This is useful to control the two wheels with hardware PWM and have a precise control of the move. The camera holder can be safely controlled with a software PWM and we did not experience any troubles doing so. * You can easily replace those parts by equivalent ones as long as you keep in mind that the battery pack should be able to provide enough current for the raspberry pi and the servos. We used standard USB battery packs for simplicity and user friendliness. However, they are more expensive than standard modelling lithium batteries and provide less current in general. * We had to use two battery packs. Indeed, the peak current due to the servos starting was too excessive for the battery pack and it was crashing the raspberry pi. Using two separate alimentation lines for the raspberry pi and the servos, we no longer have this problem and this solution is easier than tweaking the alimentation line until the raspberry pi stops freezing (which it may never do).
For the next version, we plan to add: * 1 small 5” HDMI screen - $59.95 * 1 bluetooth speaker with integrated mic - $14 * 1 usb bluetooth adapter for the speakers - $14
Total with these parts: $228
Notes: * We used an HDMI screen as the official RaspberryPi screen uses most of the GPIOs pins, which we need. * We decided to use bluetooth speakers as the integrated sound card was not usable as we were using the two hardware PWM lines for motion. This way, we have a speaker with a built-in microphone, which smaller than having the two of them separately. * The USB bluetooth adapter is impressively expensive, but it is the only one we found at the moment which we were sure would be compatible with Linux without any problems. Plus others adapters we found were not much cheaper. * The total budget is $223 without shipping. It is a bit over the initial budget goal, but we can easily lower it to $200. Indeed, we did not especially look for the cheaper parts. In particular, we bought the servos from Adafruit and I think we can find some servos for less (especially the camera holder servo, which can be a micro servo at $5 and should be enough). The bluetooth adapter is quite expensive as well and we could find a cheaper one I think. Budget shrinkage will be our next goal, once we have everything working.
Building the robot
All the necessary stuff is in our git repo (or its github mirror, both should be kept in sync). The repo contains three main directories: - blueprints which are the models of the robot. - disty which is the main server code on the Raspberry Pi. - webview which is the web controller served by the Raspberry Pi.
First of all, you should cut the parts and print the 3D parts in the blueprints dir. eps files in this directory are ready to cut files whereas svg files should be the same ones in easily editable format. You should laser cut the top and bottom files. picam_case_* files are the camera case we used,
You should 3D print:
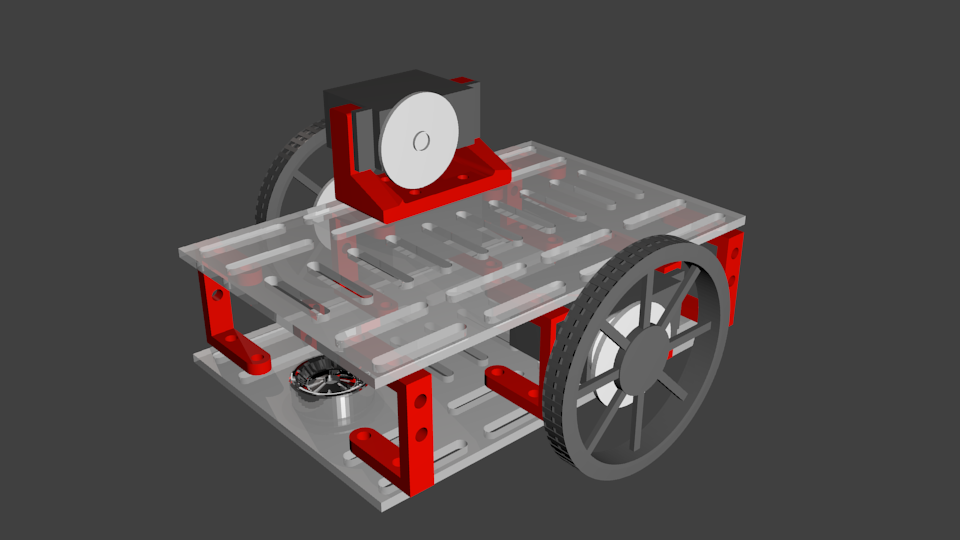
* the picam_case_* files for the camera case (licensed under CC BY SA). * teleprez.blend is the complete CAO model of the robot in Blender. * camera_servo_holder.stl is the plastic part to hold the camera servo. You
need to print it once. * wheel_servo_holder.stl is the plastic part to hold the servos for the
wheels. You need four of them.
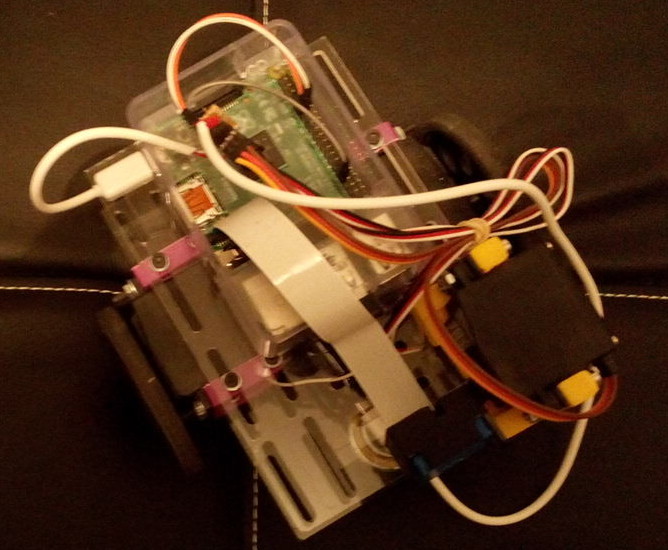
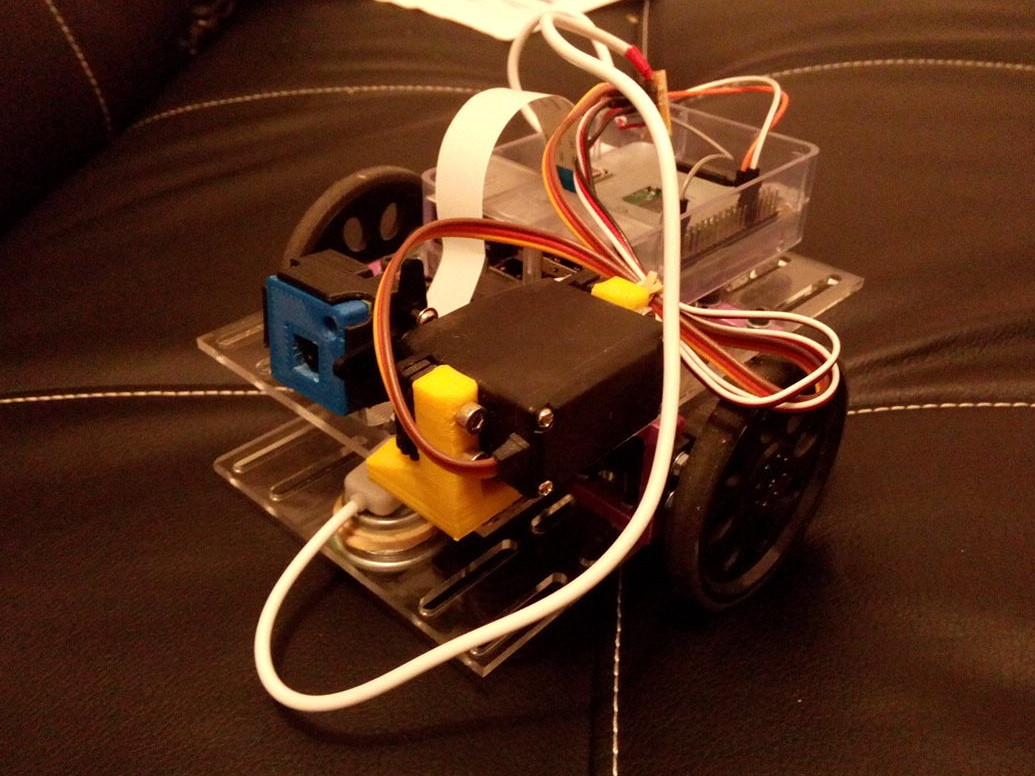
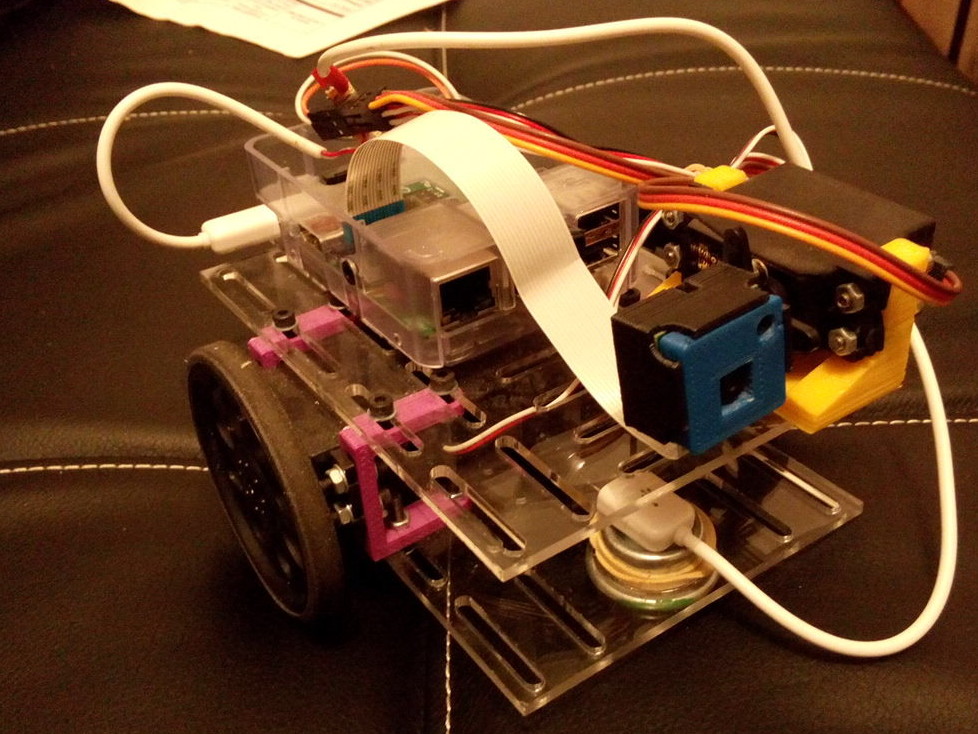
Assembling your Disty robot should be straightforward and easy to do if you look at the following pictures :) Use two ball transfer units to stabilize the robot and lock them with some rubber band (or anything better than that). Adjust tightly the height of the wheels so that the two wheels and the ball transfer units touch the ground.
GPIO pinout for the connection can be found at https://raw.githubusercontent.com/hackEns/Disty/master/blueprints/gpio.png.

For the electrical wiring, we used a standard USB-Micro USB cable to power the Raspberry Pi from one battery (located below the robot, to add weight on the ball transfer units and ensure contact is made with the surface). On the other battery, we just cut a USB - Micro USB cable to plug into it and connect the servos directly through a piece of breadboard to the battery. We had to use two batteries to prevent the draw from the servos to reboot the Raspberry Pi.
Here you are, you have a working Disty!
Running it
This may not be super user-friendly at the moment, we hope to improve this in the future.
Download any Linux image you want for your Raspberry Pi. Install uv4l and the uv4l-webrtc component. Enable the camera and ensure you can take pictures from the command line (there is a lot of doc) about this on the web.
Then, clone the Git repo somewhere on your Raspberry Pi. You should build the main disty code (which is the serverside code). This code will handle the control of the servos (emit PWMs etc) and listen on UDP port 4242 for instructions sent from the webview. Instructions to build it are located in the associated README. You will need cmake and a system-wide install of wiringpi to build the code.
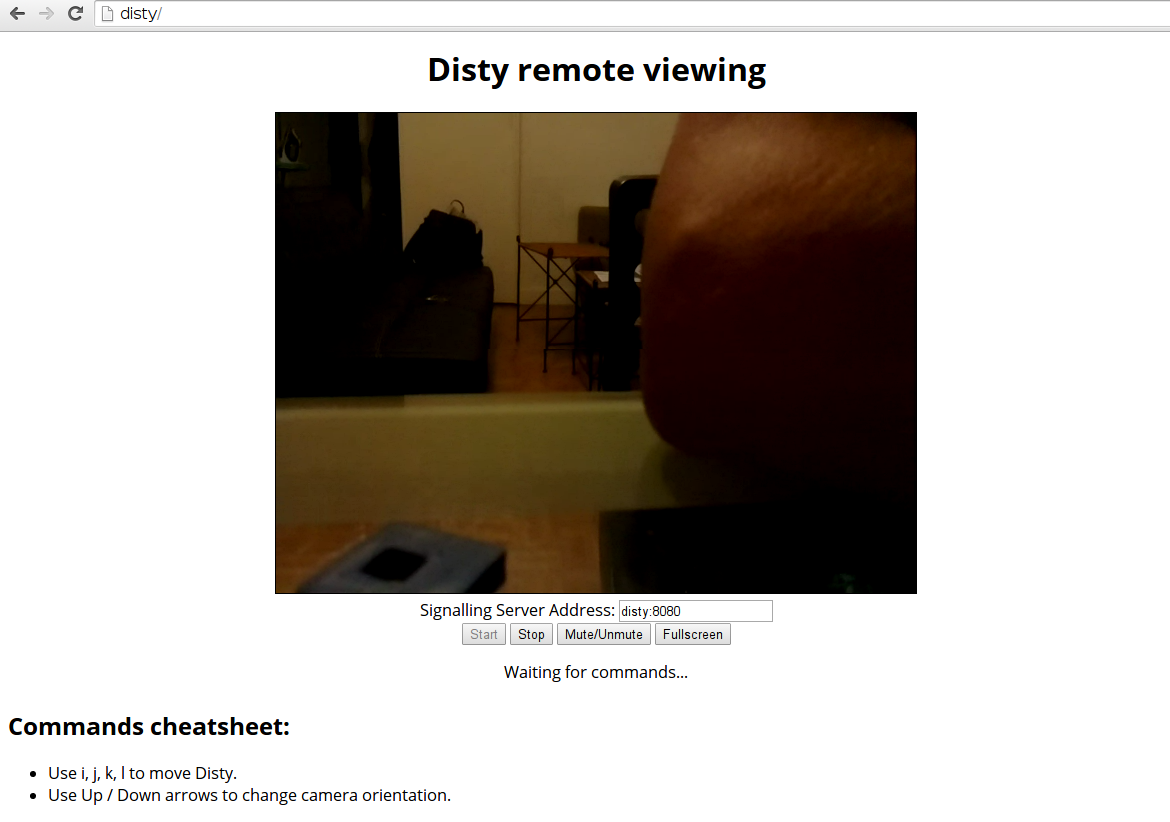
You can then start the robot. Start by launching the disty program (as root as you need access to the GPIOs), ./disty, and then start the webview, ./run.py as root also as it serves the webview on port 80, which is below 1024 and owned by root. If you have ZeroConf on your Raspberry Pi (or a decent router), you can go to http://disty (or whatever hostname is set on your Raspberry Pi) to get the webview. Else, use the IP address instead. Webview usage should be almost straightforward.
It should work out of the box on your local LAN. If you are behind a NAT, it will need some black magic (which is implemented but may not be sufficient) to connect the remote user and Disty camera. In any case, you need to be able to access the webview (disty port 80) from the remote side.
Contributing!
All contributions and feedbacks are more than welcomed!
All the source code we wrote is under a beer-ware license, under otherwise specified.
“THE BEER-WARE LICENSE” (Revision 42): Phyks and Élie wrote this file. As long as you retain this notice you can do whatever you want with this stuff (and you can also do whatever you want with this stuff without retaining it, but that’s not cool…). If we meet some day, and you think this stuff is worth it, you can buy us a beer in return. hackEns
If you need a more legally valid license, you can consider Disty to be under an MIT license.
Some sources of inspiration and documentation
- http://www.pcmag.com/article2/0,2817,2427997,00.asp, cool but really expensive!
- http://josh.com/notes/bitlybot/, a really basic telepresence robot
- https://known.phyks.me/2015/controlling-servomotors-on-a-raspberry-pi, for the problems we encountered with the servos on the Raspberry Pi
- http://gafferongames.com/networking-for-game-programmers/udp-vs-tcp/