Generating your own vector tiles
Posted on December 30, 2018 in Dev • 10 min read
There is a cycle-oriented OpenStreetMap render available, called OpenCycleMap. Sadly, OpenCycleMap is not really open (as in opensource) and it is not easy to report issues and get bug fixes. Moreover, you cannot selfhost it and have to pay after a given number of requests.
There were discussions recently, on
#osm-fr@oftc.net and on the
French OSM
mailing-list
about eventually having an alternative render dedicated to cycling which would
be totally opensource, free software and selfhostable.
This was the occasion to have a first look at tile rendering (and in particular vector tiles rendering, based on OpenMapTiles). Here is a quick getting started guide.
Vector vs raster tiles
Many articles are available online about the difference between vector and raster (bitmap files) tiles, so I will not write too much about this here to keep this article short. The rendering of vector tiles is done on the client side and the tiles are usually smaller in weight than the equivalent raster tiles.
Let us just sum up the main facts we might use about vector tiles before starting:
- There are quite a few different standards and formats for vector tiles. We will focus on the protocol buffer standard from Mapbox here.
- Vector tiles encode geographical data according to a certain schema, which describes how the vector data is organized into thematic layers and which attributes are actually included and served to the client. We will focus here on using the OpenMapTiles schema which is a standard and open source schema for vector tiles.
- The render of vector tiles on the client side requires a style (which is a JSON file encoded according to Mapbox GL style specification). Using the standard OpenMapTiles schema for the vector tiles means you can easily re-use any Open Map Styles. This also makes it possible to use style editors such as Maputnik Editor or Mapbox Studio.
Note: Using Mapbox specifications just means building on top of their standard, to be able to reuse the tiles definitions and styles. Using a style in Mapbox GL style does not enforce you to use Mapbox GL at all. You can still use OpenLayers or Leaflet.
Note: Using vector tiles and OpenMapTiles schema does not mean you can never do a raster render. Provided that the style to use is known by the server, it could do a raster render and serve both vector tiles and raster tiles at the same time.
OpenMapTiles provide a ready to use self-hostable solution with downloadable vector tiles from their server, built from OSM data. Sadly, the free vector tiles are really outdated and getting up to date tiles is super expensive. This article will focus on serving OpenMapTiles from an OSM data export and a regular PostgreSQL / PostGIS database.
Requirements
Let’s start with a Vagrant VM
$ cat Vagrantfile
# -*- mode: ruby -*-
# vi: set ft=ruby :

Vagrant.configure("2") do |config|
  # Use a Ubuntu box
  config.vm.box = "ubuntu/bionic64"

  # VM disk size, consider at least 20GB for a regional extract.
  config.disksize.size = '40GB'

  # Forward port for Tegola
  config.vm.network "forwarded_port", guest: 8080, host: 8080
  # Forward port for Kartotherian
  config.vm.network "forwarded_port", guest: 6533, host: 6533

  config.vm.provider "virtualbox" do |vb|
    # Memory (RAM) for the VM, 8GB might be overkill
    vb.memory = "8000"
  end
end
$ # You will need vagrant-disksize plugin to define the VM disk size.
$ vagrant plugin install vagrant-disksize
$ vagrant up
$ vagrant ssh
We can now install PostgreSQL and PostGIS as well as GDAL and some basic tools
vagrant@ubuntu-bionic:~$ sudo apt-get update
vagrant@ubuntu-bionic:~$ sudo apt-get install postgis
vagrant@ubuntu-bionic:~$ sudo apt-get install gdal-bin
vagrant@ubuntu-bionic:~$ sudo apt-get install wget build-essential git unzip curl build-essential sqlite3
We will also need imposm3
vagrant@ubuntu-bionic:~$ wget https://imposm.org/static/rel/imposm3-0.4.0dev-20170519-3f00374-linux-x86-64.tar.gz
vagrant@ubuntu-bionic:~$ tar zxvf imposm3-0.4.0dev-20170519-3f00374-linux-x86-64.tar.gz
vagrant@ubuntu-bionic:~$ rm imposm3-0.4.0dev-20170519-3f00374-linux-x86-64.tar.gz
vagrant@ubuntu-bionic:~$ mv imposm3-0.4.0dev-20170519-3f00374-linux-x86-64 imposm3
vagrant@ubuntu-bionic:~$ # Add imposm3 folder to $PATH
vagrant@ubuntu-bionic:~$ echo 'PATH="$HOME/imposm3:$PATH"' >> .profile
vagrant@ubuntu-bionic:~$ # (Re)source the file to ensure $PATH is correctly set
vagrant@ubuntu-bionic:~$ source .profile
Note: The $HOME/imposm3 is prepended to $PATH for convenience here, but
it would probably be better to actually install imposm3 on the system rather
than putting this user-owned directory in the $PATH in a production setup.
Let us create a user for our PostgreSQL database
vagrant@ubuntu-bionic:~$ sudo su postgres
postgres@ubuntu-bionic:~$ psql
postgres=# CREATE USER gis;
CREATE ROLE
postgres=# ALTER USER gis WITH PASSWORD 'gis';
ALTER ROLE
postgres=# ALTER USER gis SUPERUSER;
ALTER ROLE
Note: The created user has SUPERUSER powers here, which is just a matter
of convenience for the following parts. This is not a good practice in
production setup.
Tegola
A nice and easy to get running setup is relying on Tegola. This opensource tile vector server is written in Go and therefore quite easy to get running on your machine.
The getting started doc is very good and should get you a running server for Bonn area in a matter of minutes.
They also have a repository with scripts and explanations to import your own
OSM data in the database and render
tiles using Tegola, which is super convenient to get your first rendered tiles
in your area. They also have some
styles to
use on top of this OSM data import. Just remember to edit the sources
configuration
option
to use your own Tegola server. There is a nice documentation on how to get a
render using these styles in OpenLayers using
OLMS.
Sadly, it seems that the script from Tegola does not follow the OpenMapTiles schema and you would have to adapt any OpenMapTiles style you would want to use (or change the layers in the tiles served by Tegola).
Kartotherian
Qwant recently started a (beta) map service, Qwant Maps. They published a lot of scripts and configuration files on Github. This is a super cool initiative, giving a very quick and easy way to reproduce their setup and start working with vector tiles. This seemed at this point the best lead to explore for having a vector tiles server quickly. Thanks a lot to them for opening all of this!
Note: You can also use openmaptiles to generate the tiles in a OpenMapTiles compatible way. It runs using Docker.
All the useful config files lie in this repository.
Importing data
The first step is to import OSM data in a database. This is handled by this script and the documentation is available here.
First, let us install the required dependencies for this script to run:
vagrant@ubuntu-bionic:~$ # Let's install the required osml10n extension for PostgreSQL from
vagrant@ubuntu-bionic:~$ # https://github.com/giggls/mapnik-german-l10n
vagrant@ubuntu-bionic:~$ git clone https://github.com/giggls/mapnik-german-l10n
vagrant@ubuntu-bionic:~$ cd mapnik-german-l10n
vagrant@ubuntu-bionic:~/mapnik-german-l10n$ sudo apt-get install debhelper libicu-dev postgresql-server-dev-all postgresql-server-dev-10 libkakasi2-dev libutf8proc-dev pandoc
vagrant@ubuntu-bionic:~/mapnik-german-l10n$ make deb
vagrant@ubuntu-bionic:~/mapnik-german-l10n$ sudo dpkg -i ../postgresql-10-osml10n_2.5.4_amd64.deb
Then, let us create the PostgreSQL database to import data to
vagrant@ubuntu-bionic:~$ sudo su postgres
postgres@ubuntu-bionic:/home/vagrant$ psql
postgres=# CREATE DATABASE gis;
CREATE DATABASE
postgres=# \c gis;
You are now connected to database "gis" as user "postgres".
gis=# CREATE EXTENSION postgis;
CREATE EXTENSION
gis=# CREATE EXTENSION hstore;
CREATE EXTENSION
gis=# CREATE EXTENSION unaccent;
CREATE EXTENSION
gis=# CREATE EXTENSION fuzzystrmatch;
CREATE EXTENSION
gis=# CREATE EXTENSION osml10n;
CREATE EXTENSION
Then, let us install the import script and its dependencies
vagrant@ubuntu-bionic:~$ # Make sure to clone Git submodules as well
vagrant@ubuntu-bionic:~$ git clone --recurse-submodules https://github.com/QwantResearch/kartotherian_config
vagrant@ubuntu-bionic:~$ cd kartotherian_config/import_data
vagrant@ubuntu-bionic:~/kartotherian_config/import_data$ # Install pip and pipenv
vagrant@ubuntu-bionic:~/kartotherian_config/import_data$ sudo apt-get install python-pip
vagrant@ubuntu-bionic:~/kartotherian_config/import_data$ sudo pip install pipenv
vagrant@ubuntu-bionic:~/kartotherian_config/import_data$ # Create the virtualenv
vagrant@ubuntu-bionic:~/kartotherian_config/import_data$ pipenv install
vagrant@ubuntu-bionic:~/kartotherian_config/import_data$ # Let's install the required pgfutter tool (https://github.com/lukasmartinelli/pgfutter)
vagrant@ubuntu-bionic:~/kartotherian_config/import_data$ cd && wget -O pgfutter https://github.com/lukasmartinelli/pgfutter/releases/download/v1.2/pgfutter_linux_amd64 && chmod +x pgfutter && sudo mv pgfutter /usr/bin/
vagrant@ubuntu-bionic:~$ # Let's install the other required dependencies
vagrant@ubuntu-bionic:~$ sudo apt-get install osmctools
Let us now configure the import script. In import_data/invoke.yaml, you should:
- Check your PostgreSQL credentials in the
pg:section (onlyhostwhich should belocalhostif you followed this guide). - Set the URL of the OSM export to use, in the
osm:section. You can use any export from Geofabrik for instance. Consider using a small extract (like regional one) to start with. - Finally, create a
/datafolder to store generated files:sudo mkdir /data && sudo chown vagrant:vagrant /data.
Note: You should also update the main_dir and sql_dir configuration
entries in import_data/invoke.yaml to point to
/home/vagrant/kartotherian_config/imposm. You should also replace the
language.sql, postgis-vt-util.sql, import-water.sh and
import_osmborder_lines.py paths in the import_data/tasks.py file by
../external-dependencies/import-sql/language.sql,
../external-dependencies/postgis-vt-util/postgis-vt-util.sql,
../external-dependencies/import-water/import-water.sh and
../external-dependencies/import-osmborder/import/import_osmborder_lines.sh.
This is done in this
PR which
might get merged at some point.
Finally, we can run the import of OSM data. This will download the latest OSM dump specified in the configuration and import it along the other required data.
vagrant@ubuntu-bionic:~/kartotherian_config/import_data$ # Make sure to run the
vagrant@ubuntu-bionic:~/kartotherian_config/import_data$ # pipenv command from the import_data folder.
vagrant@ubuntu-bionic:~/kartotherian_config/import_data$ pipenv run invoke
Install kartotherian
Then, let us install Kartotherian to serve the vector tiles using data from the database.
vagrant@ubuntu-bionic:~$ cd
vagrant@ubuntu-bionic:~$ git clone https://github.com/kartotherian/kartotherian
vagrant@ubuntu-bionic:~$ cd kartotherian
vagrant@ubuntu-bionic:~/kartotherian$ # Let us install NodeJS. Careful to take version 8
vagrant@ubuntu-bionic:~/kartotherian$ # and not above. This does not work with the `nodejs`
vagrant@ubuntu-bionic:~/kartotherian$ # version from the official repositories.
vagrant@ubuntu-bionic:~/kartotherian$ curl -sL https://deb.nodesource.com/setup_8.x | sudo -E bash -
vagrant@ubuntu-bionic:~/kartotherian$ sudo apt-get install nodejs
vagrant@ubuntu-bionic:~/kartotherian$ # Install the rest of dependencies
vagrant@ubuntu-bionic:~/kartotherian$ sudo apt-get install pkg-config libcairo2-dev libjpeg-dev libgif-dev
vagrant@ubuntu-bionic:~/kartotherian$ # Install all the JS dependencies
vagrant@ubuntu-bionic:~/kartotherian$ npm install
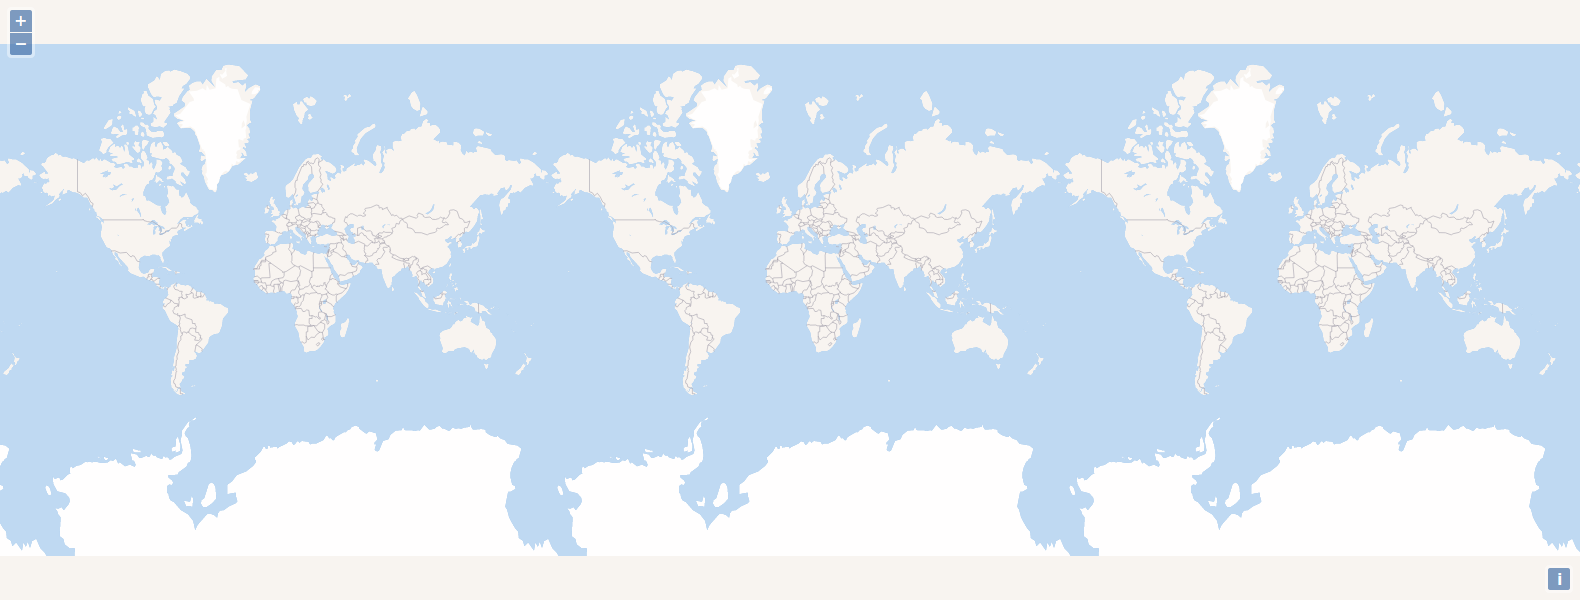
You can check everything is working fine by running node server.js -c
config.external.yaml. This will start the tile server, listening on port
6533 and relaying tiles from Wikimedia directly (as a CDN, not using any
local data). If you go to http://localhost:6533 in your browser, you should
see a map background appearing, with tiles from Wikimedia.
Note: This should now be
fixed. There seems
to be an issue with the
node_modules/@kartotherian/snapshot/lib/autoPosition.js file and I had to
edit it to get the Kartotherian server running. Here is the diff
<     worldLatLng = new L.LatLngBounds( [ -90, -180 ], [ 90, 180 ] ),
---
>     worldLatLng = new L.LatLngBounds( [ -90, -180 ], [ 90, 180 ] );
Serving tiles using imported data and Kartotherian
The Qwant setup uses Tilerator for pre-generating tiles and store them in a Cassandra server.
As we are just experimenting with a small area so far and we are not running the server in production at all, we can skip this component and serve directly the tiles from the database (tiles generation will be done at each time and this will be slower, but this is definitely fine for tests).
vagrant@ubuntu-bionic:~/kartotherian$ # Set a config.yaml file for Kartotherian
vagrant@ubuntu-bionic:~/kartotherian$ cat config.yaml
# Number of worker processes to spawn.
# Set to 0 to run everything in a single process without clustering.
# Use 'ncpu' to run as many workers as there are CPU units
num_workers: 0

# Log error messages and gracefully restart a worker if v8 reports that it
# uses more heap (note: not RSS) than this many mb.
worker_heap_limit_mb: 250

# Logger info
logging:
  level: trace

services:
  - name: kartotherian
    # a relative path or the name of an npm package, if different from name
    module: ./app.js
    # per-service config
    conf:
      port: 6533
      # the location of the spec, defaults to spec.yaml if not specified
      spec: ./spec.template.yaml
      # allow cross-domain requests to the API (default '*')
      cors: '*'

      # Kartotherian variables and sources
      variables: {
        'osmdb-user': 'gis',
        'osmdb-pswd': 'gis',
        'osmdb-host': 'localhost',
        'cassandra-servers': ['localhost:9042'],
        'cassandra-user': '',
        'cassandra-pswd': ''
      }
      sources: /home/vagrant/kartotherian_config/tilerator/sources.yaml

      modules:
      - "tilelive-tmstyle"
      - "@kartotherian/autogen"
      - "@kartotherian/babel"
      - "@kartotherian/cassandra"
      - "@kartotherian/layermixer"
      - "@kartotherian/overzoom"
      - "@kartotherian/postgres"
      - "@kartotherian/substantial"
      - "@kartotherian/tilelive-tmsource"
      - "@kartotherian/tilelive-vector"
      - "@mapbox/tilejson"

      requestHandlers:
      - "@kartotherian/maki"
      - "@kartotherian/snapshot"
vagrant@ubuntu-bionic:~/kartotherian$ # Edit kartotherian_config files
vagrant@ubuntu-bionic:~/kartotherian$ cd ~/kartotherian_config/tilerator
vagrant@ubuntu-bionic:~/kartotherian$ # Edit the DB credentials (user, password, host) in the tm2source files
vagrant@ubuntu-bionic:~/kartotherian$ $EDITOR data_tm2source_*.yml
vagrant@ubuntu-bionic:~/kartotherian$ # Edit the paths to tm2source files in sources.yaml
vagrant@ubuntu-bionic:~/kartotherian$ $EDITOR sources.yaml
vagrant@ubuntu-bionic:~/kartotherian$ # Install Cassandra (https://cassandra.apache.org/download/)
vagrant@ubuntu-bionic:~/kartotherian$ # Cassandra is not necessarily needed
vagrant@ubuntu-bionic:~/kartotherian$ # but having it will avoid printing useless errors in Kartotherian output.
vagrant@ubuntu-bionic:~/kartotherian$ echo "deb http://www.apache.org/dist/cassandra/debian 311x main" | sudo tee -a /etc/apt/sources.list.d/cassandra.sources.list
vagrant@ubuntu-bionic:~/kartotherian$ curl https://www.apache.org/dist/cassandra/KEYS | sudo apt-key add -
vagrant@ubuntu-bionic:~/kartotherian$ sudo apt-get update
vagrant@ubuntu-bionic:~/kartotherian$ sudo apt-get install cassandra
Finally, we can start the Kartotherian server:
vagrant@ubuntu-bionic:~/kartotherian$ npm start
Rendering tiles in the browser
Kartotherian serves a demo interface to check tiles generation is working on
http://localhost:6533. Sadly, it seems this is only working with png tiles
and not with vector tiles only such as our setup. This is not a big deal and
getting a first render is quite simple though :)
First, let us create a base HTML page with an OpenLayers map:
$ cat index.html
<!doctype html>
<html lang="en">
    <head>
        <link rel="stylesheet" href="https://cdn.rawgit.com/openlayers/openlayers.github.io/master/en/v5.3.0/css/ol.css" type="text/css">
        <style>
            #map{height:600px;width:100%;}
        </style>
        <script src="https://cdn.rawgit.com/openlayers/openlayers.github.io/master/en/v5.3.0/build/ol.js"></script>
        <script src="https://cdn.jsdelivr.net/npm/ol-mapbox-style@3.5.0/dist/olms.js" type="text/javascript"></script>
        <title>OpenLayers example</title>
    </head>
    <body>
        <div id="map"></div>
        <script type="text/javascript">
            olms.apply('map','style.json');
        </script>
    </body>
</html>
Then, we need a style for the vector tiles render. You can use any style from OpenMapTiles or the custom map style from Qwant. For instance, let us use the OSM Bright style.
$ curl "https://raw.githubusercontent.com/openmaptiles/osm-bright-gl-style/master/style.json" > style.json
$ # Edit the "url" key under the "sources" and set it to your Kartotherian server:
$ #     "url": "/info.json"
$ # (see below)
$ # Also remove the `sprite` and `glyphs` lines in the `style.json` file.
$ # These are not working and the style is usable for testing purposes without
$ # them.
$ $EDITOR style.json
Note: There seems to be an issue with the style.json not being a correctly
formatted JSON file at the time of writing this article. I had to replace
this
line with "layers": [{ (note the extra bracket). See this
issue or this
PR.
Then, we need to fetch the TileJSON describing the available tiles:
$ curl http://localhost:6533/gen_basemap/info.json > info.json
$ # Add
$ #     , "tiles": ["http://localhost:6533/gen_basemap/{z}/{x}/{y}.pbf"]
$ # at the end of the file, before the last closing "}"
$ $EDITOR info.json
Note: I guess you could use http://localhost:6533/gen_basemap/info.json in the style.json file directly. Sadly, this JSON file does not contain the
tiles URL and OpenLayers could not render correctly then. I’m not exactly sure
why this is happening yet.
Note: Kartotherian config defines many
available
sources.
The two main ones are the lite variant for mobile devices and the basemap
variant for regular devices. The Qwant setup is using
Tilerator to pre-generate all the
tiles and store them in Cassandra (with the gen_basemap source). Then, the
basemap source can be used. As we use directly Kartotherian with this
configuration file, we are directly using the gen_basemap source to have
live generation of the tiles. POIs are in a different layer (gen_poi /
poi) so they will not be displayed on our vector tiles.
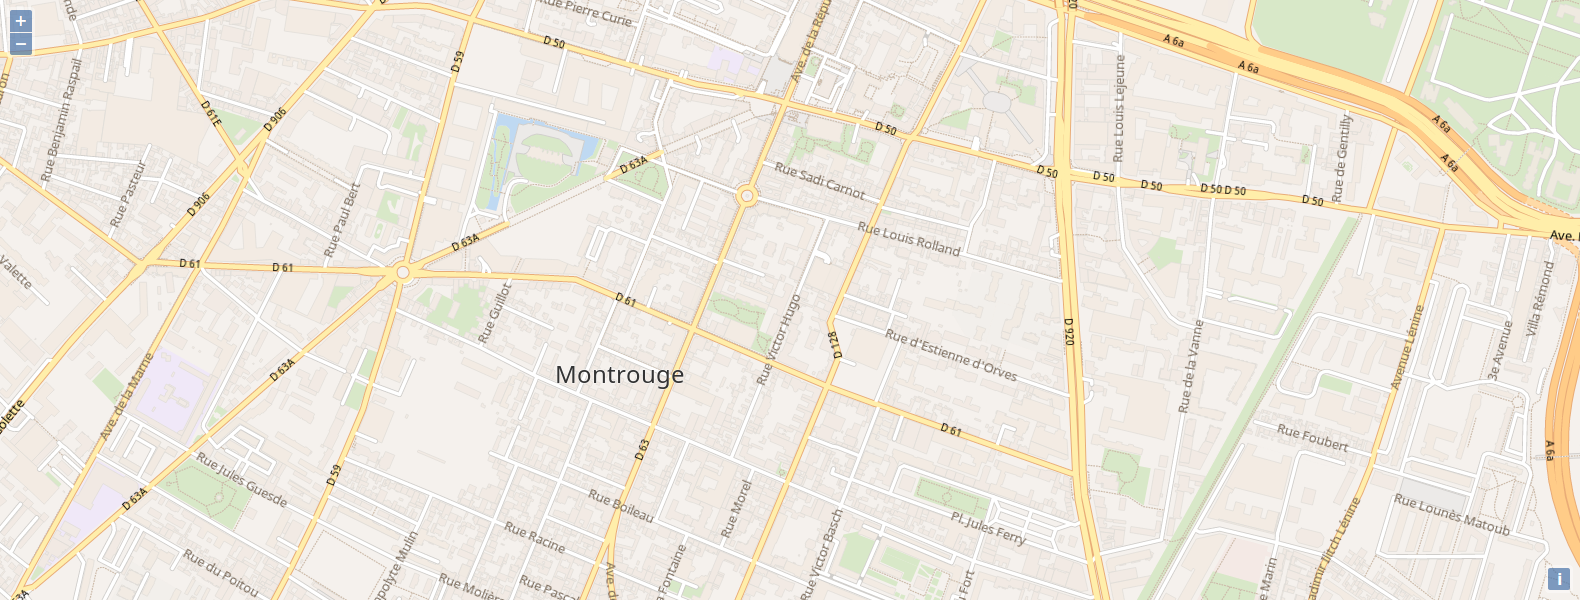
Finally, just start your webserver to access index.html file or use
python3 -m http.server and head to http://localhost:8000. Here you go, you
should have a map with a live render of your vector tiles! Note that tiles
generation is done on demand and this could take a bit of time depending on
your computer power.

Next steps
Now, next steps will be the extension of the OpenMapTiles schema to include cycling data (no such info is embedded at the moment). Then, there should be a custom style to have a render similar to OpenCycleMap, with emphasis on the cycle infrastructure.
There will probably be more articles in this series to cover this :)